Table of contents:
Key takeaways:
- A webcam or smartphone, an external microphone, headphones, and basic lighting is all you need to capture professional-quality testimonials.
- Prepare your customer before recording and share expectations and light talking points so they feel confident and sound natural on camera.
- Record remotely or asynchronously to let customers join live or record on their own schedule.
- Guide the testimonial with a clear structure by asking them to explain who they are, the problem they faced,and what changed.
Video testimonials are recordings of real customers sharing their positive experiences with your business. These reviews build trust by showing that actual people use your product and genuinely find value in it.
In this step-by-step guide, we’ll walk you through how to record a video testimonial online, asynchronously, or right from your phone.
And don’t worry, it’s easier than you might think!
How to record a video testimonial online: Step-by-step
Recording a video testimonial remotely online is easy with Riverside. All you have to do is set up your studio, invite your customer, and hit record. Here’s how to do it, step by step.
What you’ll need
Before you get started, you need to make sure you have the right equipment. This includes:
- Camera: A high-quality webcam works great. A modern smartphone can deliver excellent results, too, especially if you record with the back camera.
- Microphone: Clear audio matters more than perfect video. An external mic is best, and even a basic USB microphone will noticeably improve sound quality.
- Headphones: Wearing headphones helps you catch audio issues in real time and prevents echo in the final recording.
- Recording software: Use software like Riverside to capture high-quality audio and video, especially when recording guests remotely.
- Lighting: Natural light is ideal. Face a window or place a simple ring light in front of you. If you can, use a basic 3-point lighting setup.
Once you have all that together, you’re ready to get started.
Step 1: Prepare your space
Before you start recording, prepare your space so that it looks professional. You’ll want to set up your lighting and ensure that your background is tidy and uncluttered. This is especially important if you’re going to be visible on the video.
Step 2: Prepare your client/customer
The single most important step for capturing a great video testimonial is preparing your client or customer. A little upfront guidance goes a long way toward relaxed, natural responses on camera. Before you record, make sure they know:
- How long it will take: Let them know how long they should plan to speak and how much time the full recording process will take.
- Where the video testimonial will be used: Be clear about where the testimonial will appear, whether it’s your website, ads, or social media.
- The tone to aim for: Casual and conversational works best. They don’t need to sound scripted or polished.
- Simple talking points: Share prompts rather than exact lines, such as “What problem were you trying to solve?”, “Why did you choose this product or service?”, and “What changed after you started using it?”
- How to prepare their recording space: Ask them to sit in a quiet room, face a window or light source, choose a clean background, and position the camera at eye level.
It’s also a good idea to invite them into your online recording studio a few minutes early. This gives you time to check their camera and microphone, make small adjustments, and chat briefly before the recording. This should help them feel more comfortable and confident on camera, too.
Step 3: Log in to your Riverside Studio
Once you’ve got your prep out of the way, log in to Riverside. If you don’t have an account, you can set one up and record for free.
Step 4: Schedule your session
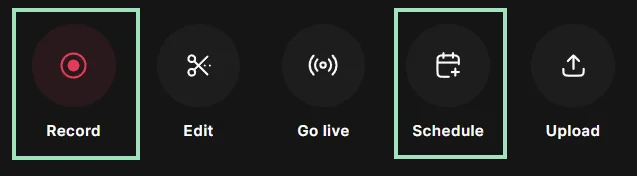
Click “Schedule” to plan a recording session and invite a guest. They will receive an email and calendar invite. They’ll also receive a link that will send them directly to the studio you created.
Step 5: Start your session
When it’s time for your recording, find your scheduled event under “Projects.” Select it, then click “Start Session.”

Confirm your mic, camera, and whether you’re wearing headphones, then click “Join Studio.” Don’t worry, recording won’t start until you click “Record!”

Step 6: Adjust your settings
Now that you’re in your recording studio, you can adjust settings while waiting for your guest. You can:
- Designate recording resolution and other technical settings under “Settings.”
- Add a script or notes to the teleprompter, so you can view it while you’re recording. Just click on the “Script” button at the bottom, then select “Teleprompter.”
- Adjust the layout to display one speaker or both speakers in various formats (side-by-side, picture-in-picture, etc).
- Add branding such as logos, brand colors, or overlays.
Note that because you’ve already set up your studio, you can also configure these elements well in advance of your recording time.
Step 7: Start recording
When you and your guest are both ready, click “Record.” After a 5-second countdown, your recording will begin. Let your guest speak naturally and don’t worry about mistakes. You can edit those out later.

Step 8: Stop recording
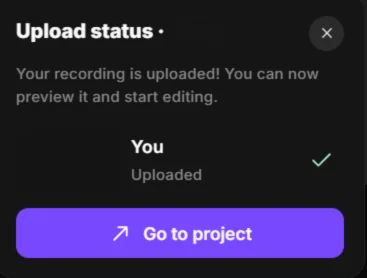
When you’re done, click “Stop” to end the recording. Ask your guest to stay in the studio until your recording has processed to ensure it is fully uploaded to the cloud and safely stored. When it’s ready, a popup will appear prompting you to “Go to project.”
Step 9: Edit your video testimonial
Even though you’ve finished recording, you’ll get the most out of your testimonial if you polish it before sharing it with your followers or potential customers.
From “Projects,” select your new recording and click “Edit” to open it in the editor.
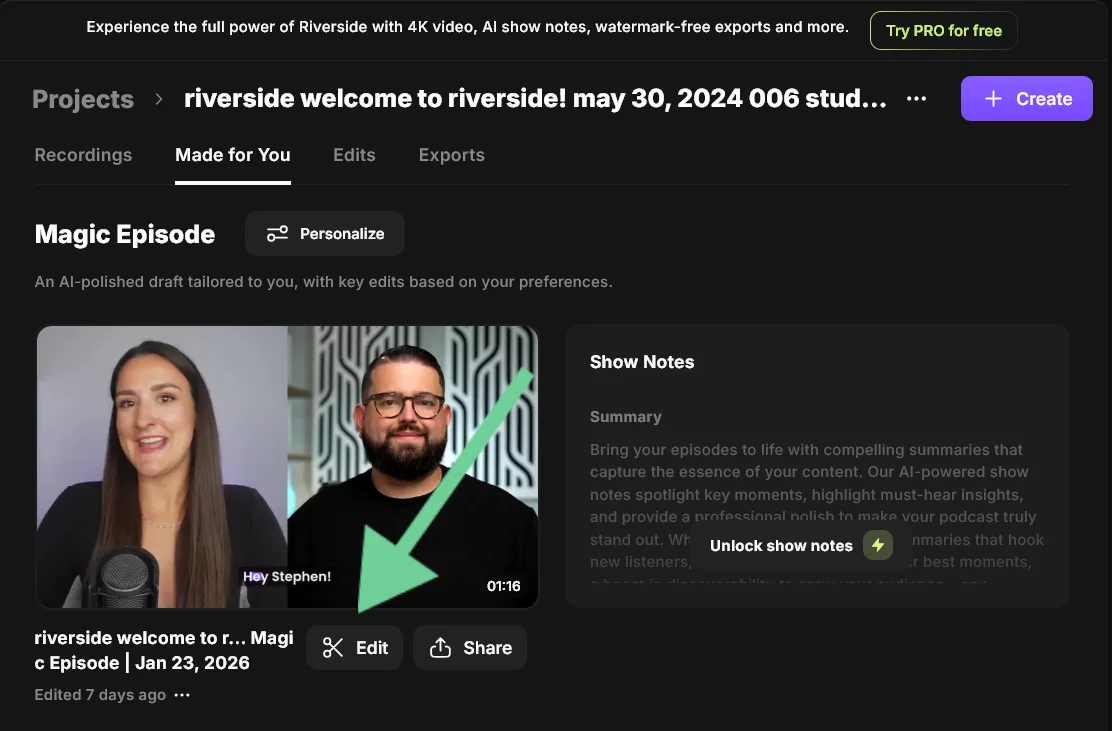
From here, you can:
- Trim the video using the text-based editor.
- Add and style captions in seconds using your automatic transcript.
- Add music, intros, and outros.
- Adjust the layout.
- Add branding, videos, B-roll, or images.
- Enhance sound and remove background noise using Magic Audio.
- Clean up your audio by removing pauses and filler words with a click.
- Fix your interviewee’s gaze for natural eye contact.
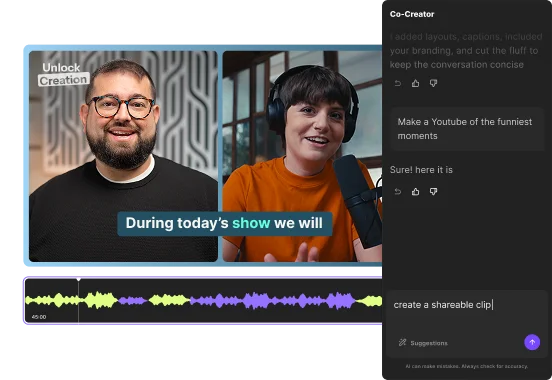
- Edit and repurpose your video with simple prompts by chatting with our AI agent, Co-Creator.
And that’s it!
How to record a video testimonial asynchronously
Recording asynchronously means setting up your recording studio and allowing your guest to record on their own when it’s convenient for them. This can make the process of getting video testimonials much more efficient and scalable. With Riverside’s asynchronous recording feature, the process is seamless.
Here’s how to do it, step by step.
Step 1: Open a Riverside Studio
Log in to Riverside. If you don’t have an account, you can start one for free, but note that async recording is only available under Riverside’s Business plan.
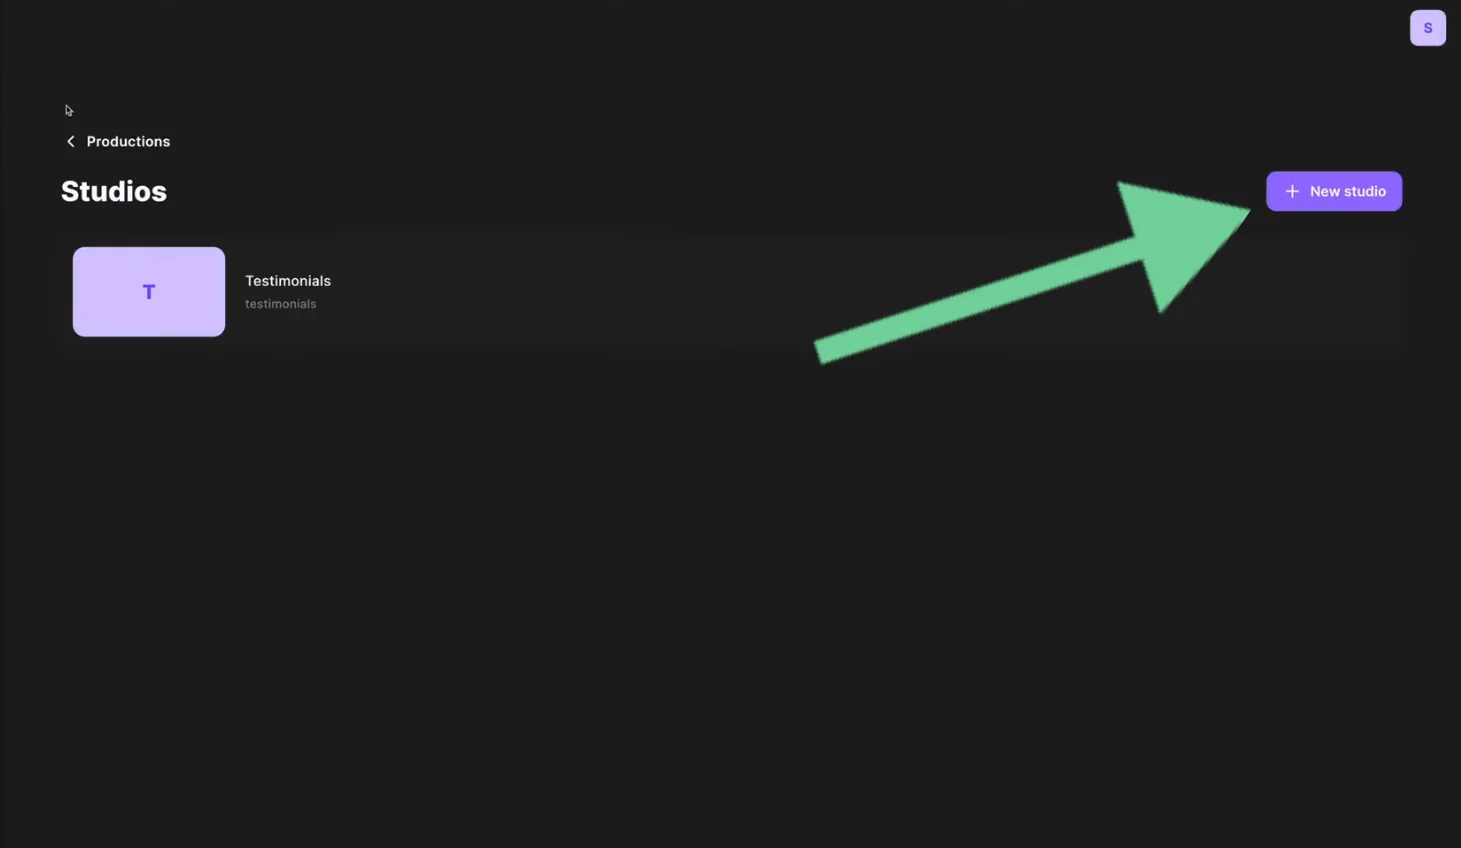
Open an existing studio or click “New Studio” to start a new one.
Step 2: Invite guests to record asynchronously
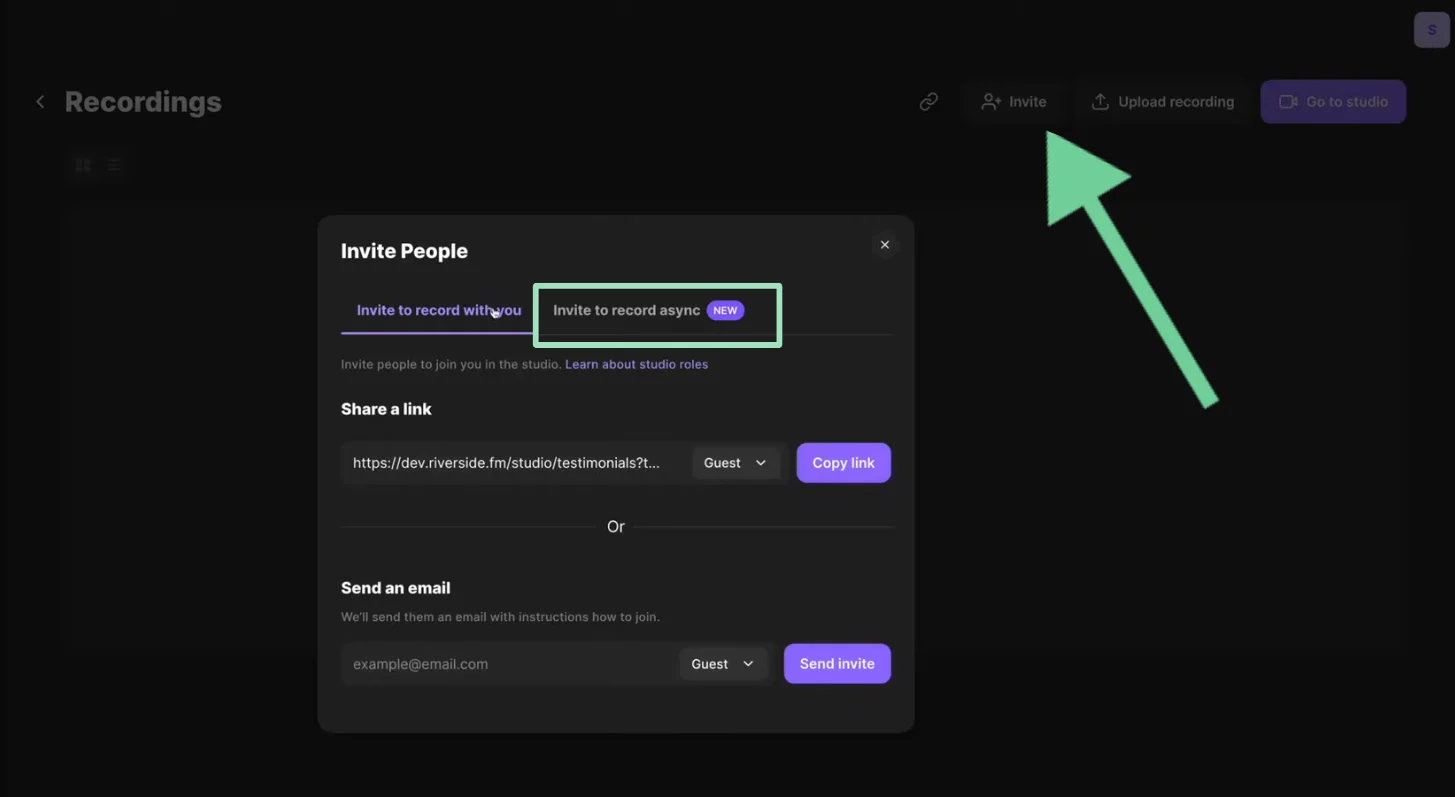
In your studio, click the “Invite” button and you’ll see 2 options. Select “Invite to record async.”
Here, you can create a link for your guest to record. You can also create multiple links for different guests, each with a separate script or bullet points to guide that particular guest. Once you’ve created your link, you can preview it, or share it with your guest.
Step 3: Wait for your guest to record
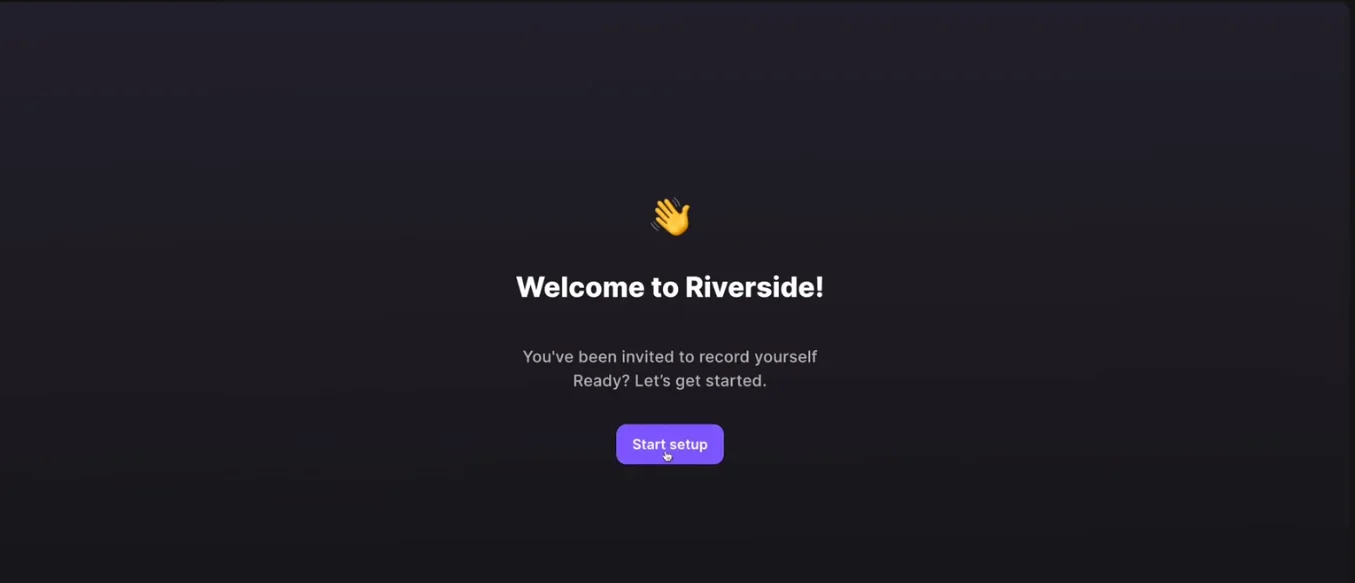
Once you’ve set up your recording, it’s up to your guest to jump in and record when they’re ready. Riverside makes this super easy by walking them through each and every step, including how to test their audio and check their framing. They’ll even get the script or bullet points you provided in their teleprompter to help guide their recording.
Your guest can start and stop recording as needed. When they’re done, they’ll be able to preview their recording or do as many retakes as they want.
Step 4: Review your async recordings
Once your guest records and submits their testimonial, you can find and review it in Riverside under “Projects.” Each video is labeled with the guest’s name and the title you originally used for the asynchronous recording link.
Step 5: Edit your video testimonial
From “Projects,” select your new recording and click “Edit” to open it in the editor. From here you can:
- Trim your video using the text-based editor.
- Add captions and lower thirds.
- Adjust layouts.
- Remove background noise, filler words, and long silences with a click.
- Find short, shareable highlights for social media using Magic Clips.
- Edit and repurpose your video with simple prompts using the AI Co-Creator.
How to record a video testimonial on your phone
Most modern smartphones have excellent cameras, making them a solid option for recording a video testimonial. Here’s how to do it using Riverside’s free mobile app.
Step 1: Get the Riverside app
Download Riverside’s mobile app from the App Store (iPhone) or Google Play (Android).
Step 2: Set up your studio
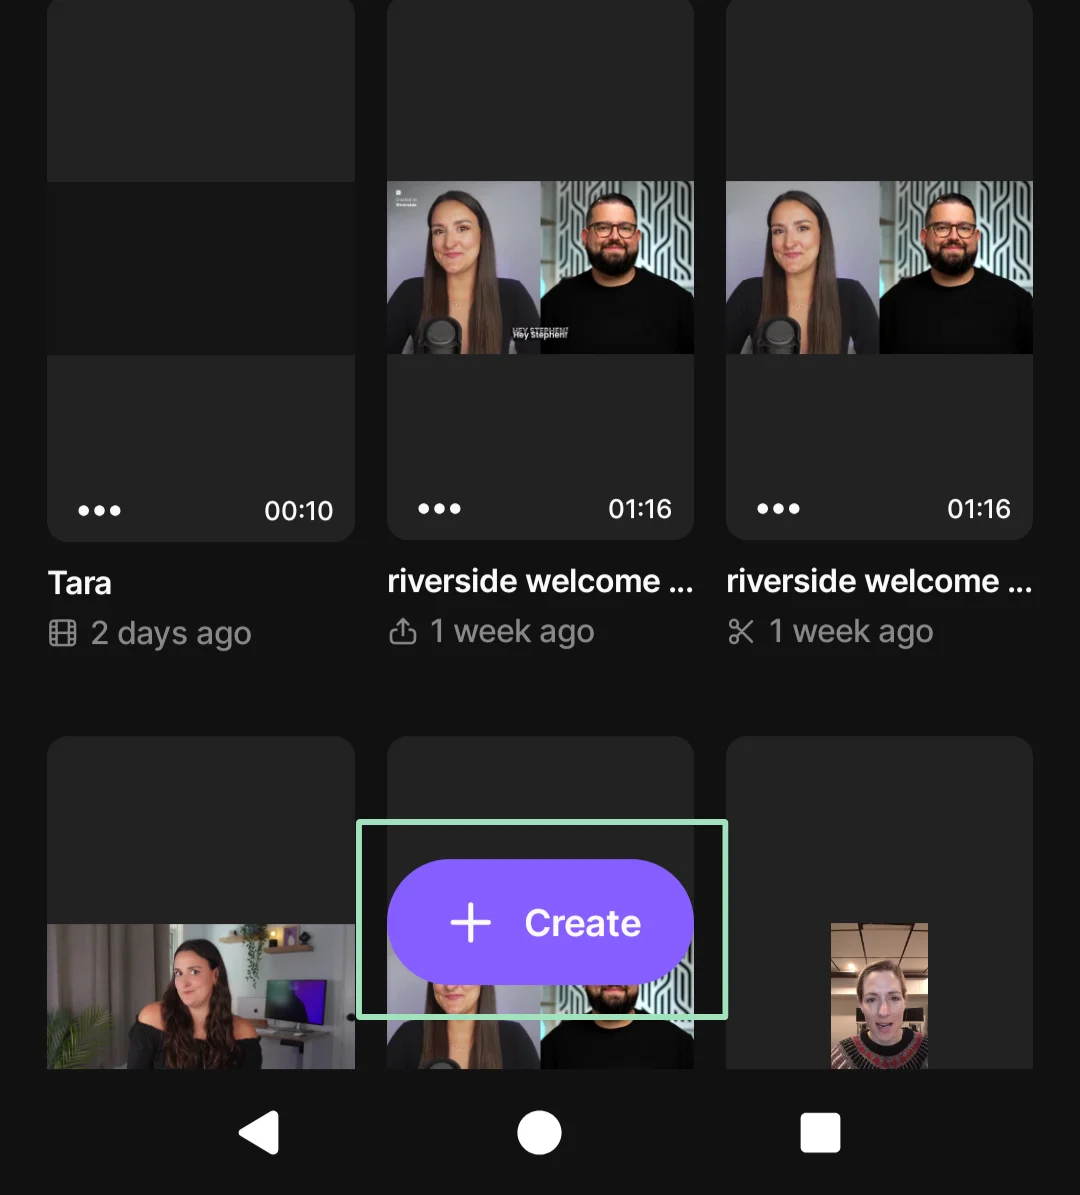
Open the Riverside app and tap “Create” to get started.
Step 3: Invite your guest
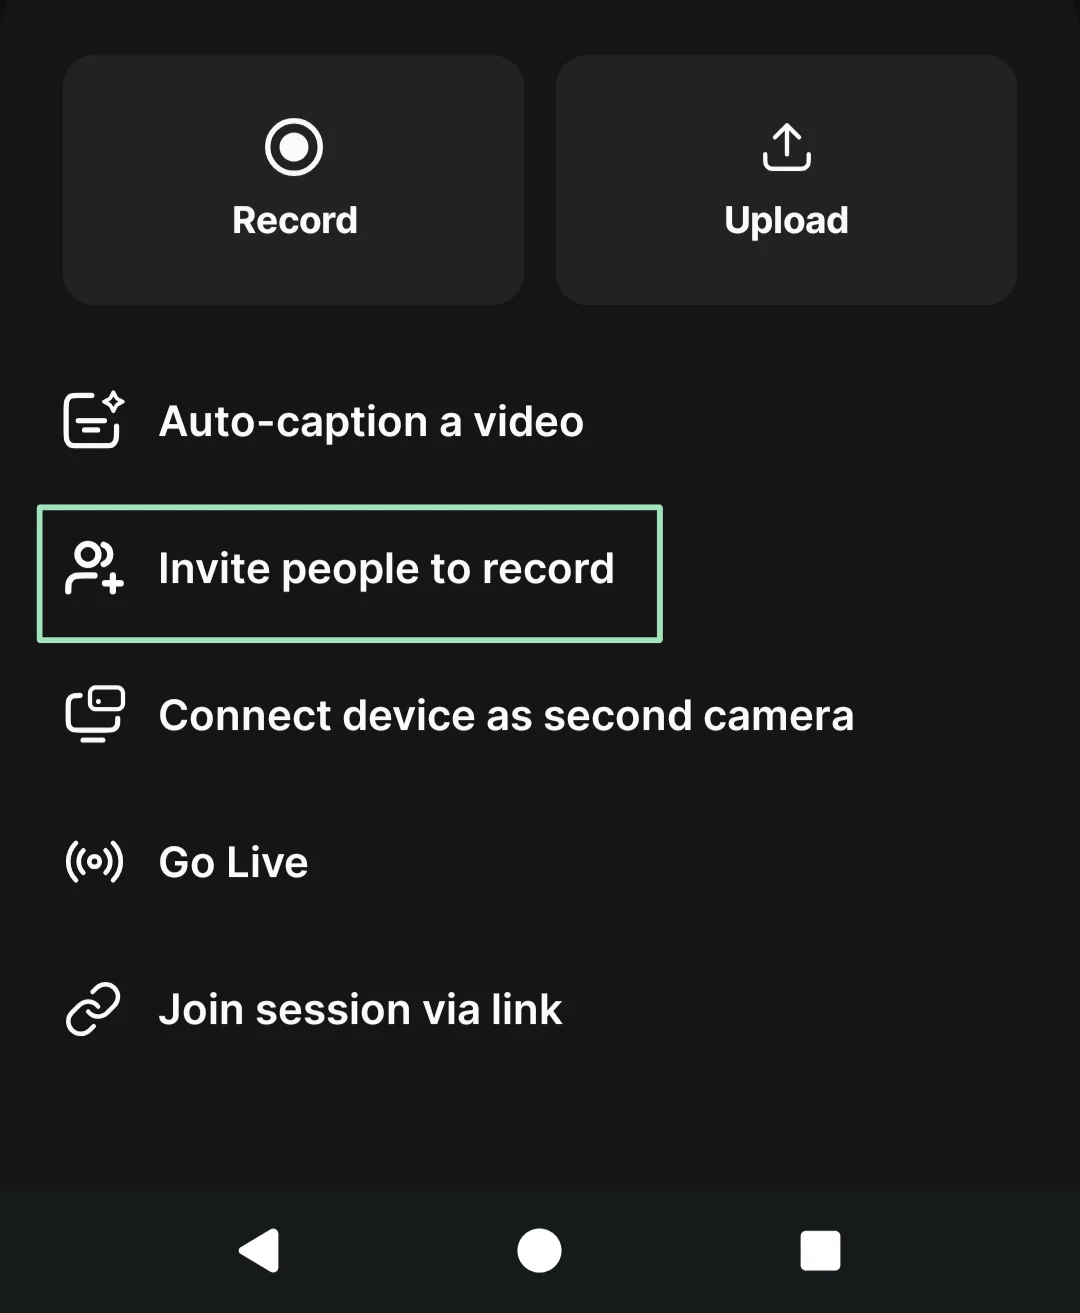
Tap “Invite people to record” and choose a method to share a link with your guest. You can copy and share the link, or share it directly through email, text, or other messaging apps.
Step 4: Start recording
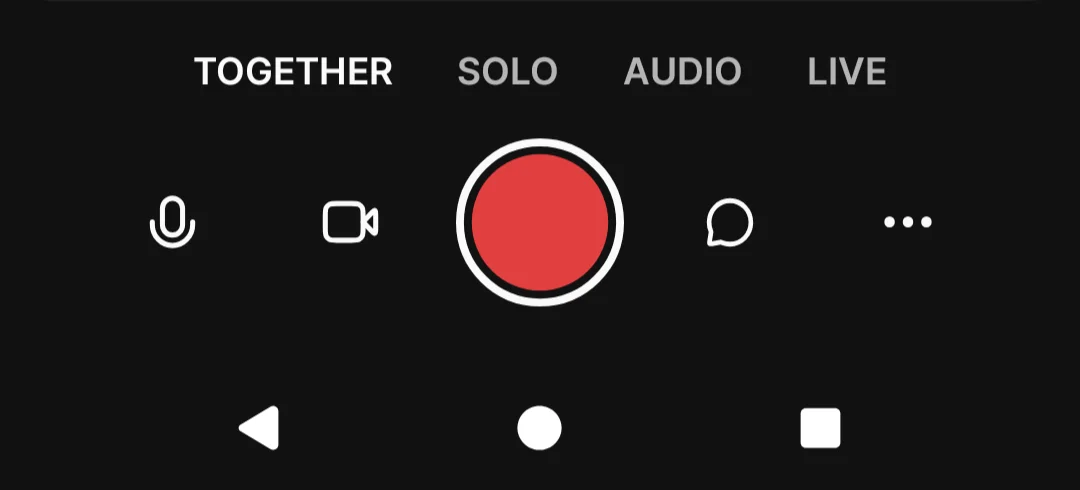
Tap “Record” to open your studio. When you’re ready, hit the red button to start the recording.
Step 5: Stop the recording
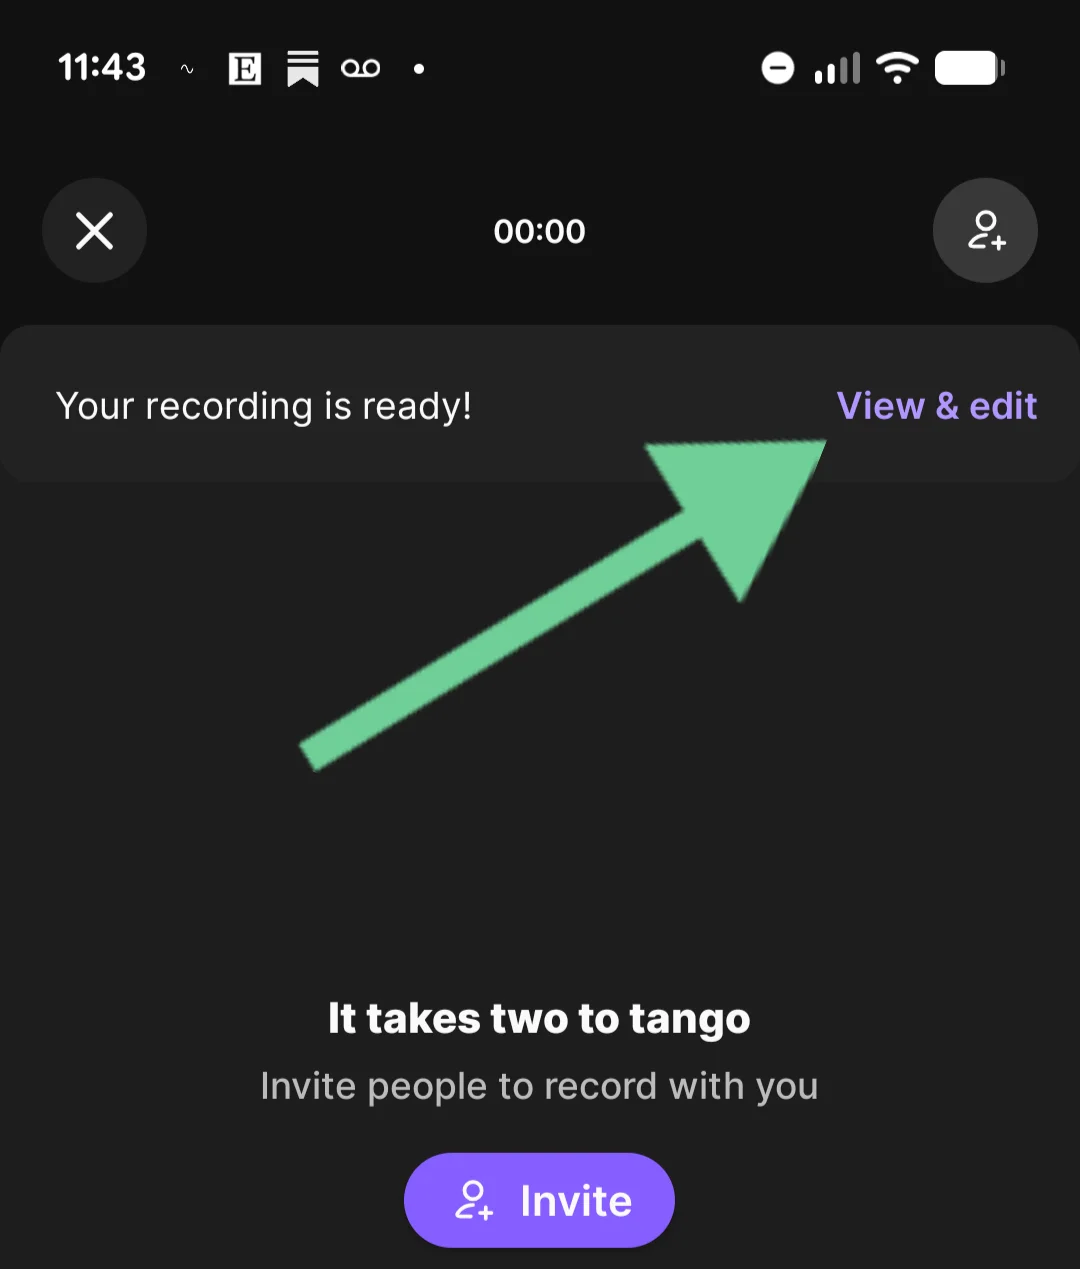
When you’re done, tap the red button again to stop the recording. You’ll receive a notification when your recording is ready to be viewed.
Step 6: Edit your video testimonial
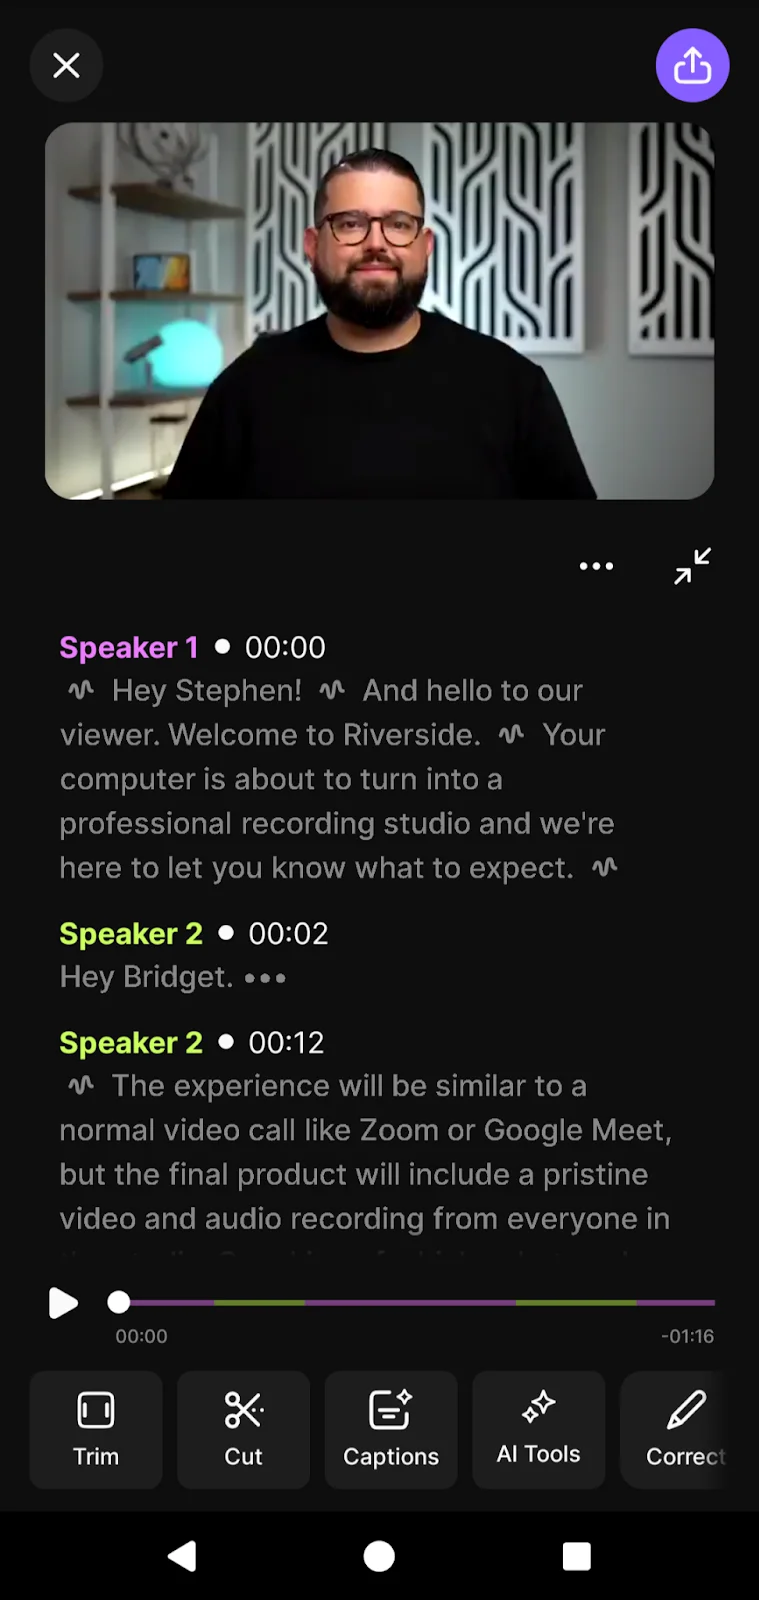
The Riverside app provides you with basic editing options, including trimming your video, adding captions, and correcting your transcript. You can also use Magic Audio to upgrade your sound.
If you want to edit your video using Riverside’s full set of tools, you can open your recording in Riverside’s desktop version. Since recordings upload to the cloud, it’s a seamless handoff between mobile and desktop workflows.
Read: 6 Ways to Record Remote Video Testimonials Professionally
Best template for effective video testimonials
If you want customers to deliver strong video testimonials, give them a light framework to follow. The words should always be their own (real experiences sound best), but a clear structure keeps their message focused and compelling.
Ask them to cover:
- Introduction: Have the guest introduce themselves and their company (if relevant). This establishes credibility and helps viewers quickly see themselves in the story.
- The problem: Ask them to explain the challenge they were facing. This is where you hook your ideal audience of potential customers dealing with the same issue.
- The experience and results: What changed after using your product or service? How did it improve their work or day-to-day life?
- Recommendation: Who would they recommend your product or service to, and why?
This structure keeps testimonials authentic, easy to follow, and far more persuasive than an open-ended prompt.
Read: Customer Testimonial Videos: Why They Matter and How to Create Them
3 examples of video testimonials (and why they work)
Want a few stellar video testimonial examples to get inspired for your own? Here are some of our favorites.
Zoom and Slack customer testimonial
In this testimonial, HubSpot’s VP of Corporate Development Andrew Lindsay breaks down how Slack and Zoom solve communication challenges at scale. Clear problem-solution framing, combined with high-quality footage of HubSpot’s offices, makes the video both informative and engaging.
Explainify customer testimonial
This video testimonial keeps things simple and gets the job done. It uses a proven introduction-problem-results structure. And, it stays engaging by pairing the talking head with product footage throughout.
Lemonlight customer testimonial
This testimonial stands out by featuring multiple decision-makers, each clearly outlining the challenge and how Lemonlight helped solve it.
For more great video testimonial examples, check out our Video Testimonials 101 guide.
FAQs about recording video testimonials
How can I get customers to give me testimonials?
The easiest way to get customers to give you testimonials is to ask at the right moment, usually after they’ve experienced a clear win. This could be when they’ve completed a project, achieved a result, given positive feedback, or expressed satisfaction unprompted.
Look for natural signals, such as a thank-you email, a positive review, a support ticket that closed successfully, or a milestone being reached.
Let your customer(s) know what you’re asking for, how long it will take (usually just a few minutes), and where the testimonial will appear. Providing a few talking points or a short template can also help customers feel more genuine and confident.
If possible, make it easy to record or asynchronously by sharing a Riverside link so they can participate on their own schedule.
What software is used to collect testimonials?
There are many types of software that you can use to collect video testimonials, but some are much better than others. You can choose from:
- Video testimonial software: This software is designed just for collecting testimonials and is very efficient, but it tends to lack editing features and may not record in high quality. Examples include Trust or VideoAsk.
- Video conferencing software: You can also use platforms like Zoom and Google Meet to record video testimonials. They, too, have lower quality audio and video, and limited (or no) editing tools.
- Dedicated video recording software: Software like Riverside records in high-quality and provides editing tools to help you polish your recording. And with Riverside, you can even record asynchronously.
You can learn more in our guide on the top video testimonial software.
Is there free video testimonial software?
Yes, there are free options for recording video testimonials. You can use Zoom’s free plan, but recording time is limited and recording quality is low. You can also record and edit unlimited footage with Riverside for free.
How should I display client testimonials?
Client testimonials are displayed best when they’re easy to find and tied closely to your product or service. Place your strongest testimonials where users are already deciding, such as your homepage, product pages, pricing pages, or near calls to action.
Use real names, titles, companies, and photos or videos whenever possible. This helps build credibility. Short quotes are ideal for scanning, while longer testimonials or video clips work well on dedicated testimonial or case study pages.
When done well, testimonials should reinforce your message at key decision points and make it easier for potential customers to say yes.
How long should a video testimonial be?
Most video testimonials perform best when they’re 30 to 90 seconds long. This is enough time for a customer to explain the problem they faced, what changed after using your product or service, and why they recommend it.
Shorter testimonials (30 to 45 seconds) work well on social media and landing pages. Slightly longer ones (60 to 90 seconds) are better for websites, sales pages, or case studies.
If a testimonial runs longer, consider breaking it into multiple shorter clips. Concise, focused stories are more engaging, and more likely to be watched all the way through.


.webp)